Our Top Picks
A mini itx build guide comes down to one rule: choose the case first, then make every other part fit inside its published limits. A Mini-ITX motherboard is 170 mm by 170 mm, so the board itself is rarely the problem. The tight spots are graphics card length and thickness, CPU cooler height, the SFX or SFX-L power supply, and heat. Build in the order below, check each clearance against the case maker’s spec sheet, and a small gaming PC is no harder to assemble than a full tower, only less forgiving of sloppy cable work.
Quick answer
| Step | What to do | Why it matters in a small case |
|---|---|---|
| 1 | Pick the case and read its clearance numbers | GPU length, GPU thickness, cooler height and PSU type are all fixed by the case |
| 2 | Pick the GPU to fit the case, not the other way round | Three-slot cards need a case rated for triple-slot width |
| 3 | Pick a compact cooler under the height limit | Cooler height limits range from roughly 50 mm in tiny cases to about 160 mm in larger ones |
| 4 | Pick an SFX or SFX-L power supply | A standard ATX unit will not fit most small cases |
| 5 | Assemble the CPU, RAM and M.2 drive on the board outside the case | Access is limited once the board is mounted |
| 6 | Fit the PSU and route cables before the board and GPU | Short SFX cables must be dressed while there is still room |
| 7 | Install the board, cooler and GPU, then update the BIOS and set fan curves | Noise and temperature are the main trade-offs in a small build |
What a Mini-ITX build changes compared with a normal one
Mini-ITX is a motherboard standard measuring 170 mm by 170 mm, developed by VIA Technologies in 2001 according to its Wikipedia entry. Because the board is small, it normally has two RAM slots, one PCIe x16 slot and often only one or two M.2 slots. Everything else about a small form factor (SFF) build follows from the case rather than the board.

CORSAIR SF850 (2024) Fully Modular Low Noise ATX Power Supply – Black | Low-Noise, Fully Modular, 80 PLUS Platinum, Zero RPM Mode, SFX-to-ATX Bracket Included, NA
Chosen because it specifies Black and Low-Noise.
View on Amazon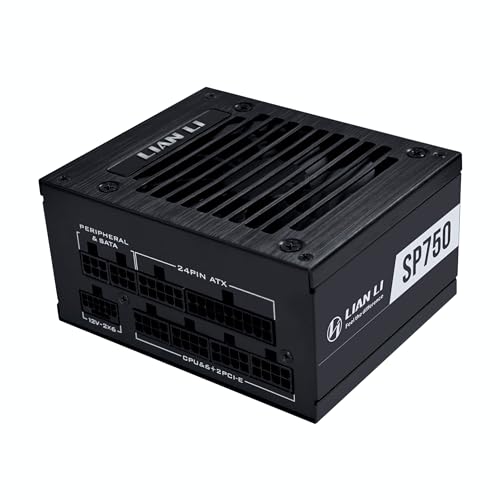
LIAN LI SP750 V2 750W SFX Power Supply, 80 Plus Gold, Black (SP750G.B) | ATX 3.1-ready SFX power with native 12V-2x6 cable, fully modular design, quiet 92mm FDB fan, and 10-year warranty.
Chosen because it specifies 80 Plus Gold and Black (SP750G.B).
View on Amazon
Corsair SF1000 (2024) Fully Modular Low Noise 80 Plus (Black) (Renewed) | 3.0 Compliant, PCIe 5.0 Ready, SFX-to-ATX Bracket Included
Chosen because it specifies 3.0 Compliant and PCIe 5.0 Ready.
View on Amazon
Corsair SF1000 SFX Power Supply CP-9020257-NA Black (Renewed) | 1000W, 80 Plus Platinum, fully modular, ATX 3.0, PCIe 5.0, SFX-to-ATX bracket, 105C Japanese capacitors
Chosen because it specifies 1000W and 80 Plus Platinum.
View on AmazonIn a mid-tower you pick parts that are individually good and the case swallows them. In a Mini-ITX case you work backwards from a list of hard limits. That is why the best approach to how to build a mini gaming PC starts with a spreadsheet of numbers rather than a shopping list of products. The figures below come from manufacturer specifications or named independent guides, and you should always replace the examples with the numbers for your own case.
Mini-ITX or micro-ATX
Many readers searching for a micro atx build guide are really deciding between the two sizes. Micro-ATX boards are 244 mm square according to the ATX family specifications, so they sit between Mini-ITX and full ATX. The choice is mostly about what you give up.
| Factor | Mini-ITX | Micro-ATX |
|---|---|---|
| Board size | 170 x 170 mm | 244 x 244 mm |
| Typical RAM slots | 2 | 4 |
| Typical PCIe slots | 1 (x16) | up to 4 |
| Typical M.2 slots | 1 to 2 | 2 to 3 |
| Case volume (typical gaming cases) | roughly 10 to 25 litres | roughly 25 to 40 litres |
| PSU | SFX or SFX-L in most cases | often a standard ATX unit |
| Cooling headroom | tight, fans run harder | much easier |
| Build difficulty | higher: cable routing and clearances | close to a normal build |
If you want a small PC but do not need to carry it, a micro-ATX case is cheaper, quieter and simpler. Choose Mini-ITX when desk space or portability is the real constraint, not as a default. A two-slot board also means you give up add-in cards: a capture card or a second NVMe adapter will not fit beside the GPU, so decide up front whether you need them.
Step 1: choose the case and read the clearance numbers
Pick the case before anything else because it sets four limits that cannot be negotiated: maximum GPU length, GPU thickness in slots, CPU cooler height and PSU form factor. Cooler Master’s NR200 is a useful worked example because its numbers are widely published. Per Cooler Master’s specifications, the NR200 is an 18.25 litre case that accepts triple-slot GPUs up to 330 mm long, CPU coolers up to 155 mm tall with the vented steel panel (153 mm with the tempered glass panel), SFX-L power supplies up to 130 mm long, and a 280 mm radiator. The related NR200P Max lists GPUs up to 336 mm.
Other layouts behave differently. Some sandwich-style cases put the GPU on a riser cable on the other side of the board, which allows very thick cards but limits cooler height. Some tiny cases accept only dual-slot or even single-slot cards. Treat every example here as an illustration of the method and read your own case’s manual.
Common Mini-ITX case layouts
| Layout | GPU orientation | Strength | Trade-off |
|---|---|---|---|
| Traditional mini-tower | Vertical board, GPU horizontal | Easy to build, familiar airflow | Largest of the small designs |
| Sandwich / riser layout | GPU parallel to the board on a riser cable | Very compact, supports thick cards | Riser must be PCIe-rated, cooler height can be limited |
| Tiny console-style case | Low-profile or short dual-slot card | Smallest footprint | Few GPU choices, noisy under load |
Worked fit check
Take a case rated for a 330 mm card, a 155 mm cooler and SFX-L power. Suppose the GPU is 304 mm long, which is the length reviewers list for the RTX 4090 Founders Edition, a 3-slot design about 61 mm thick. The length margin is 330 minus 304, which equals 26 mm. That is enough for a fan frame or a cable bend. A partner card longer than 330 mm would not fit at all, even though it can pass a quick compatibility check on a parts-list site. Now check cooler height: with a 153 mm limit for the glass panel, a 150 mm cooler leaves only 3 mm, which is acceptable only if you confirm the real cooler height on the maker’s page. Add a few millimetres of margin to every single measurement, because the quoted figures include only the part, not cables or fan frames.
Step 2: choose a GPU that fits and can breathe
Size, thickness and fan placement matter more than raw speed in a small case. Three rules help:
- Check length and thickness in slots. A dual-slot card leaves air gaps to the side panel. A 3-slot card in a case rated for exactly 3 slots can sit within a few millimetres of the panel and run hotter.
- Match the cooler design to the airflow. If the side panel is mesh and the GPU faces it, open-air axial fans work well. If the GPU sits against a solid panel, a shorter, cooler-running card is easier to keep quiet.
- Use power as a filter. Every 100 W of GPU power is 100 W of heat to remove from a few litres. Many SFF builders pick the next card down and undervolt it rather than force a high-power flagship into a tiny case.
The NR200 listing itself recommends slim fans on the bottom when GPUs are wider than 2.5 slots, a good reminder that the case maker has already told you where the trouble starts.
Step 3: choose the CPU and cooler for heat, not just speed
Cooling a CPU in 15 litres is easier when the CPU is efficient. The same boost clock from a lower-power chip simply produces fewer watts for the case to push out. Three practical points follow.
- Decide between low-profile air, a tower cooler and a 120 to 280 mm AIO. In the NR200, which supports a 280 mm radiator, an AIO frees the space over the board for RAM access. In cases without radiator support, a compact tower cooler under the listed height is the answer.
- Check RAM clearance under the cooler. With only two RAM slots, low-profile modules are cheaper than moving a cooler. DDR5 modules with tall heat spreaders can collide with the fan of a side-mounted cooler.
- Set a power limit in the BIOS. Many boards offer a package power or eco mode. Lowering the sustained limit by 20 to 30 per cent often cuts noise noticeably while giving up little in games, because most games load only some cores.
Platform and board choice
| Platform | Socket | RAM | Mini-ITX chipset examples | Small-case note |
|---|---|---|---|---|
| AMD Ryzen 7000 / 9000 | AM5 | DDR5 | A620, B650, B850, X870 | Efficient; X3D chips need good cooler contact |
| Intel Core Ultra 200S | LGA1851 | DDR5 | Z890, B860 | Newer platform; check VRM cooling on ITX boards |
| Intel 12th to 14th Gen | LGA1700 | DDR4 or DDR5 (board dependent) | Z790, B760, H610 | Confirm the board is DDR4 or DDR5 before buying RAM |
On small boards the VRM, the group of power-regulating parts around the CPU, is packed into a small area and often shares a heatsink with the I/O cover. Read independent board reviews for VRM temperatures, because an ITX board that is fine for a mid-range chip may throttle under a flagship. Also check M.2 placement: a drive on the back of the board is usually cooler than one beneath a GPU that exhausts heat downward.
Step 4: pick an SFX or SFX-L power supply
Most Mini-ITX cases need an SFX or SFX-L unit. Per Intel’s SFX12V design guide, a standard SFX supply measures 125 mm wide, 63.5 mm tall and 100 mm deep. SFX-L keeps the same face but is deeper, commonly around 130 mm, so it can carry a larger and quieter 120 mm fan. If your case lists a 130 mm maximum PSU length, SFX-L fits only just; confirm the exact model depth.
Wattage choice follows the same logic as a normal build, with extra attention to GPU connectors:
| Tier | CPU + GPU class | Typical PSU size | Connector check |
|---|---|---|---|
| Entry | Efficient CPU with a 150 to 200 W GPU | 450 to 550 W | one or two 8-pin PCIe |
| Mid | Mid CPU with a 220 to 300 W GPU | 650 to 750 W | two or three 8-pin PCIe or one 12V-2×6 |
| High | High-end CPU with a 320 to 450 W GPU | 850 to 1000 W | native 12V-2×6 cable rather than an adapter where possible |
A worked power budget: a 65 W class CPU plus a 220 W GPU is 285 W of major load. Add about 50 W for the board, RAM, drives and fans, giving roughly 335 W. A common guideline is to choose a supply with 1.5 to 2 times the typical load to leave room for transient spikes and to keep the fan in its quiet range, which points to a 550 to 650 W unit. High-end GPUs spike harder: Tom’s Hardware reports transient spikes on the RTX 5090 far above its rated board power, which is why makers recommend generous headroom there.
Cables are shorter on SFX units and there are fewer connectors. Check how many PCIe power connectors the supply has and whether the GPU needs a 16-pin cable. Fully modular supplies save a lot of space in a small case because unused cables do not need hiding.
Step 5: assembly order that saves time
The assembly sequence for an SFF case is different from a tower because you often cannot reach anything after the board is in. Follow this order and check your case’s manual to see which panels come off.
- Prepare the board outside the case. Fit the CPU, lock the retention arm, install the RAM in both slots, and mount the M.2 drive. Do this on the board’s box on a table. Why: once the cooler and GPU are in, there is almost no room for a screwdriver.
- Update the BIOS if needed. Some boards need a BIOS update to recognise newer CPUs. Many boards offer a flashback button that works from a USB stick without a CPU installed. Check the manufacturer’s CPU support list.
- Mount the CPU cooler or AIO plate. Mount the backplate and cooler on the open board where possible. If you use an AIO, decide where the radiator goes first because the tubes limit later steps.
- Install the PSU and plan cables. Fit the PSU into its bracket and connect the cables you know you need before the board goes in: 24-pin, CPU 8-pin (or 4+4), and PCIe power cables. Why: SFX cables are short and stiff, and an unplanned route will push against the GPU.
- Mount the motherboard. Confirm the standoffs are in the right Mini-ITX positions and align the I/O area. Start all screws lightly, then tighten in a cross pattern.
- Connect front panel and USB headers. The front panel pins are fiddly, so do them while you can still see the board. Use the manual’s pinout diagram.
- Fit the GPU last. Slot it in, secure the bracket, connect the PCIe power cable, and check that the side panel closes without pressing on any cable.
- Close up and boot to the BIOS. Plug the monitor into the GPU, not the motherboard, and enable XMP or EXPO for the RAM.
Step 6: noise, temperatures and fan curves
Small cases run warmer, and the usual compromise is fan noise. Plan airflow as a single path: cool air in at one side, out at the opposite side. In most sandwich-style cases the CPU cooler and GPU each get their own intake, so make sure no panel or cable blocks either.
Concrete settings that usually help:
- Set fan curves by temperature, not by a fixed percentage. Use a gentle slope from 30 to 60 per cent between 50 and 75 degrees Celsius so fans do not spin up for short loads.
- Undervolt or power-limit the GPU. Many GPUs lose very little performance when the power limit is cut by 10 to 20 per cent, and the saved watts lower case temperature.
- Prefer larger fans. A 120 mm fan at lower RPM is quieter than a 92 mm fan moving the same air, which is why SFX-L supplies are favoured when the case allows them.
Common mistakes and how to fix them
| Mistake | What happens | Fix |
|---|---|---|
| Buying a GPU by name and not by length | Does not fit, or touches the front fans | Compare card length and slot width with the case maker’s limits |
| Cooler height equal to the case limit | Side panel will not close | Leave several millimetres of margin |
| Standard ATX PSU in a case built for SFX | Will not fit the bracket | Use an SFX or SFX-L unit, or an adapter bracket if the case supports it |
| Bending a 16-pin cable sharply at the plug | Risk of poor contact and heat at the connector | Keep a gentle curve, push the plug fully home, and use a right-angle cable if needed |
| Leaving the front-panel header until last | Cannot reach the pins | Connect it before the GPU goes in |
| GPU fans facing a solid panel | Throttling and noise | Check that intake fans face open mesh |
Safety and troubleshooting
Touch a bare metal part of the case before handling components, work on a hard non-carpeted surface, and avoid wool clothing. These are standard anti-static precautions from motherboard manuals. Do not overtighten standoffs and screws: stop when you feel firm resistance.
If the system does not start (no POST), check the following in order:
- RAM seated fully with both side clips locked. In small builds a cooler fan frame can press on the modules.
- 8-pin CPU power connected to the board’s CPU socket, not a PCIe-labelled cable.
- 24-pin connector fully seated.
- Monitor cable connected to the graphics card, not the motherboard ports.
- Front panel power switch pins on the correct header positions.
- BIOS version supports the CPU. Try the flashback procedure if the board has it.
- GPU fully inserted and PCIe power plugged in.
If it boots but throttles, look for an uneven cooler mount, an upside-down fan, or a radiator whose tubes block the intake.
Is a small build worth it?
A Mini-ITX build costs more per unit of performance, takes longer, and makes upgrades awkward. In return it fits on a desk, travels easily and looks clean. If those are not priorities, a micro-ATX or standard mid-tower will be cheaper and quieter. If they are, plan carefully and the result is a satisfying compact gaming PC, which is why many people who search for an itx build guide end up choosing one of the 15 to 20 litre cases.
How we compared
We compared manufacturer manuals, specifications and independent guides named below. We did not build or benchmark these systems ourselves.
Sources
- Cooler Master, MasterBox NR200 and NR200P product specifications
- Intel, SFX12V Power Supply Design Guide
- Wikipedia, Mini-ITX form factor entry
- Sunbeam Tech, Best Mini ITX and SFF Cases guide
- Tom’s Hardware, power supply coverage for the RTX 5090
- The FPS Review and Notebookcheck, RTX 4090 Founders Edition specifications
- Motherboard manufacturer manuals (BIOS flashback and front-panel pinouts)
Frequently Asked Questions
What is the best order for a Mini-ITX build?
Choose the case, then the GPU, cooler and PSU against its clearance numbers. When assembling, install the CPU, RAM and M.2 drive on the board outside the case, fit the PSU and cables, mount the board, and install the GPU last.
Can a Mini-ITX PC play modern games well?
Yes. The motherboard size does not limit performance. The limits are the GPU that fits the case and the heat the case can remove, so a mid-power GPU and an efficient CPU are the usual sweet spot.
Do I need an SFX power supply for Mini-ITX?
Most small cases require SFX or SFX-L. Some larger Mini-ITX cases accept standard ATX units, so check the case’s listed PSU type before buying.
How much cooler height do I have?
It depends entirely on the case. The NR200 lists 155 mm with its vented panel, while compact cases can allow only a low-profile cooler. Always leave a few millimetres of margin.
Is Mini-ITX harder to build than a normal PC?
The parts are the same, but space is tight, so cable routing and component order matter more. Following the order in this guide removes most of the difficulty.
Mini-ITX or micro-ATX: which is better?
Micro-ATX is easier to cool and cheaper, with more slots. Mini-ITX wins on size. Choose based on how much desk space or portability you need.
Will my GPU overheat in a small case?
Not if the case has an open intake near the GPU fans and you control power. Undervolting and sensible fan curves keep temperatures in check, though a high-power flagship will be loud in a very small case.