Key takeaways
- Forgetting the microSD card: Remove it before lifting the back cover.
- Using a 2280 SSD as a routine upgrade: It does not fit the standard internal layout without a specialized modification.
- Buying an M.2 SATA drive: The Steam Deck needs an NVMe SSD, not an M.2 SATA model.
- Skipping the thermal shield: Reuse the original wrap whenever possible; it is part of the intended assembly.
- Overtightening screws: Small screws strip easily and can damage plastic mounting points.
- Opening the Deck while it is asleep: Fully shut down first and disconnect power before touching internal components.
- Assuming a larger SSD is automatically better: Choose a reputable 2230 drive with appropriate fit and power characteristics, not simply the highest listed capacity.
Replacing the internal SSD can give a Steam Deck more room for games, but it is not a casual “swap and go” upgrade. A poorly fitting drive, stripped screw, torn thermal foil, pinched battery cable, or forgotten microSD card can turn a storage upgrade into an expensive repair. The safest approach is to use a properly sized M.2 2230 NVMe SSD, protect against static electricity, and reinstall the original thermal shielding exactly as intended. This guide explains how to safely replace Steam Deck 2230 NVMe SSD storage in 2026 without taking unnecessary risks.
What You Need
| Item | Why | Optional? |
|---|---|---|
| M.2 2230 NVMe SSD | The correct physical size is 22 mm wide by 30 mm long. Choose a 3.3V M.2 2230 NVMe drive, preferably single-sided for the best fit. | No |
| Steam Deck-compatible screwdriver set | You need the correct bit for your Deck revision and the small SSD-retaining screw. Using the wrong driver can strip screws. | No |
| Plastic opening picks or spudger | Separates the rear shell without gouging the plastic or damaging internal parts. | No |
| Anti-static precautions | A grounded wrist strap or touching grounded metal before handling components helps reduce static-discharge risk. | Recommended |
| USB-C flash drive, 16 GB or larger | Useful for SteamOS recovery or reimaging after the new SSD is installed. | Recommended |
| External USB-C NVMe enclosure | Lets you clone the original SSD before opening the Steam Deck, if you want to preserve the existing installation. | Optional |
| Replacement thermal pad or copper heatsink kit | Only needed if the original SSD thermal wrap is damaged or missing. Small repair kits commonly cost about $8 to $15. | Optional |
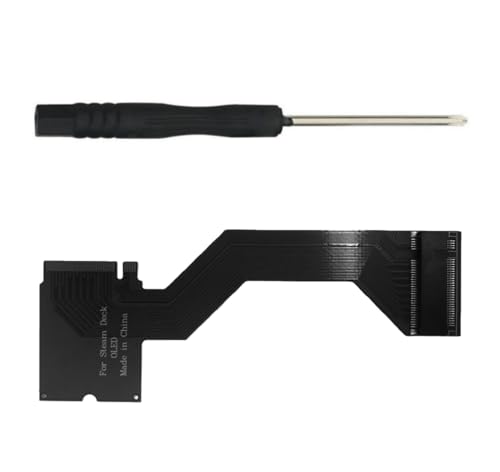
Do not buy a standard M.2 2280 drive for a normal internal replacement. A 2280 SSD measures 22 mm by 80 mm, making it 50 mm longer than the Steam Deck’s intended 2230 format. Some adapter boards are sold for specific modifications, including certain OLED-focused conversion products that may cost around $20 to $30, but they add fitment, clearance, heat, and installation complexity. For the lowest-risk upgrade, stick with a native 2230 SSD.
Our top picks

As an Amazon Associate we earn from qualifying purchases at no extra cost to you. Ratings are shown as listed on Amazon.
Step-by-Step
1. Back Up Your Steam Deck and Prepare Recovery Media (20–60 minutes)
Before opening anything, decide whether you will clone the existing drive or start fresh. Cloning may save installed games and settings, but it requires an appropriate external NVMe enclosure and enough space for the copied data. A clean SteamOS installation is usually simpler.
Back up saves that are not synchronized to Steam Cloud, screenshots, emulation files, and personal documents. Then create SteamOS recovery media on a USB-C flash drive with at least 16 GB of capacity. Keep the flash drive nearby for after the hardware installation.
Fully shut down the Steam Deck; do not use Sleep Mode. Remove any microSD card before proceeding. This is essential: a microSD card can sit close to the shell seam and may snap when the rear case is lifted.
2. Reduce Battery Risk and Set Up a Clean Work Area (10–15 minutes)
Work on a dry, uncluttered table with good lighting. Avoid carpeted floors and keep drinks away from the work surface. Touch grounded metal before handling the SSD, or use an anti-static wrist strap if you have one.
For extra protection, place the Steam Deck in Battery Storage Mode through its firmware setup options before disassembly. If you are not comfortable navigating that menu, at minimum ensure the system is fully powered down. Never open the Deck while it is charging, and unplug the USB-C power cable and all accessories.
3. Remove the Rear Cover Slowly (10–20 minutes)
Place the Steam Deck screen-down on a clean microfiber cloth. Remove the rear-case screws with a precisely fitting screwdriver. Screw types and lengths can vary by Steam Deck revision, so keep each screw organized in the order it came out. A simple labeled paper diagram works well.
Once the screws are out, insert a plastic opening pick into the seam between the front and rear housing. Work gradually around the edge to release the clips. Do not force the shell open with a metal screwdriver; metal tools can scar the housing, break clips, or slip into internal components.
Lift the rear cover carefully and set it aside. If it resists, recheck for a missed screw instead of pulling harder.
4. Disconnect Power and Access the SSD (5–10 minutes)
Locate the battery connector and disconnect it gently using a plastic tool, pulling parallel to the board rather than lifting straight up. Avoid pulling on the wires. Disconnecting the battery minimizes the chance of shorting a component while working around the SSD.
The factory SSD is covered by a thin metallic thermal and electromagnetic shielding wrap. Handle this wrap carefully. It should be reused on the new drive if it is intact, because it helps maintain the original fit and heat-management arrangement.
5. Remove the Original 2230 SSD (5 minutes)
Remove the single retaining screw at the end of the SSD. The drive should lift slightly at an angle, usually around 20 to 30 degrees. Slide it straight out of the M.2 socket. Do not bend it upward aggressively or twist it side to side.
Carefully slide the shielding wrap off the original SSD. If it is adhered, work slowly so you do not rip it. Do not discard the old SSD until the new installation boots successfully and you have confirmed your files are restored.
6. Install and Shield the New SSD (10–15 minutes)
Confirm the replacement is an M.2 2230 NVMe SSD before installing it. Align the notch in the drive with the socket, slide it in at a slight angle, then press it down gently until the screw hole aligns. Reinstall the retaining screw until snug. Do not overtighten; these are small electronics screws, not furniture fasteners.
Transfer the original thermal shielding wrap to the new drive, matching its prior orientation and ensuring it does not interfere with the connector or screw. If the original wrap is damaged beyond reuse, use a Steam Deck-specific replacement thermal pad or shield rather than stacking thick generic pads. Excess thickness can create pressure against the rear shell or motherboard.
7. Reconnect, Reassemble, and Reinstall SteamOS (20–45 minutes)
Reconnect the battery connector securely. Inspect the area for loose screws, misaligned shielding, or cables caught near the shell edge. Refit the rear cover by pressing around the perimeter until the clips engage, then reinstall the screws in their original locations. Tighten them evenly and only until secure.
Insert the prepared USB-C recovery drive, then boot into the SteamOS recovery environment. From there, choose the option that matches your plan: reinstall SteamOS, reimage the device for a clean start, or use recovery tools if you cloned the old drive. After setup, check that the full SSD capacity appears in Settings and install a small game to confirm normal operation.
Mistakes to Avoid
- Forgetting the microSD card: Remove it before lifting the back cover.
- Using a 2280 SSD as a routine upgrade: It does not fit the standard internal layout without a specialized modification.
- Buying an M.2 SATA drive: The Steam Deck needs an NVMe SSD, not an M.2 SATA model.
- Skipping the thermal shield: Reuse the original wrap whenever possible; it is part of the intended assembly.
- Overtightening screws: Small screws strip easily and can damage plastic mounting points.
- Opening the Deck while it is asleep: Fully shut down first and disconnect power before touching internal components.
- Assuming a larger SSD is automatically better: Choose a reputable 2230 drive with appropriate fit and power characteristics, not simply the highest listed capacity.
How Often
An SSD replacement is an upgrade or repair, not regular maintenance. A quality NVMe SSD should not need scheduled replacement. Consider upgrading when 64 GB, 256 GB, or 512 GB of internal storage no longer meets your needs, when the existing drive begins showing persistent errors, or when diagnostics indicate storage trouble.
To avoid replacing the SSD prematurely, keep adequate free space available, install SteamOS updates normally, and avoid repeatedly forcing shutdowns during game downloads or system updates. Periodically back up important non-cloud files, especially if you use the Deck for emulation or local media.
When to Call a Pro or Replace
Consider a professional repair shop if the rear shell will not release, a screw is stripped, the battery connector is damaged, or the Deck does not power on after reassembly. Stop immediately if you see battery swelling, smell a burning odor, or notice liquid damage.
Replace the SSD rather than troubleshooting indefinitely if the system repeatedly reports drive errors, fails to complete SteamOS installation on multiple recovery attempts, or cannot reliably detect the drive. If a new, correctly installed 2230 NVMe SSD is still not recognized, the issue may be the M.2 socket or motherboard rather than the drive itself.
FAQ
What SSD size fits inside a Steam Deck?
The standard internal fit is an M.2 2230 NVMe SSD: 22 mm wide and 30 mm long. Verify that the drive is NVMe, not SATA, and favor a single-sided model for the simplest fit.
Can I use a 2280 SSD with an adapter?
Specialized adapter modifications exist, but they are not the simplest or safest choice for most owners. A 2280 drive is much longer than a 2230 drive and may introduce clearance, thermal, and enclosure-fit concerns. A native 2230 SSD is the recommended route.
Do I need a new thermal pad when replacing the SSD?
Usually, no. Transfer the original SSD shielding and thermal material to the replacement drive if it remains intact. Buy a replacement only if the original material tears, loses adhesion, or cannot be reinstalled correctly.
Will replacing the SSD erase my Steam Deck?
Yes, unless you clone the original drive first. With a new blank SSD, you will need to use SteamOS recovery media to reinstall the operating system, sign in again, and download your games. Back up local files before beginning.