Key takeaways
- Duplicate these displays: Shows the same image on the Ally and monitor. Best for quick TV use or sharing the screen.
- Extend these displays: Creates a two-screen workspace. Best for using the monitor for games while keeping Discord, a browser, or game guides on the Ally screen.
- Show only on 2: Uses the external display only. Best for desk gaming and can reduce distraction from the Ally’s built-in screen.
Connecting a ROG Ally to an external monitor is one of the easiest ways to turn a handheld into a compact desktop or living-room gaming setup. Done poorly, though, it can lead to a blank screen, no audio, sluggish performance, battery drain, or a dock that will not unlock the Ally’s higher-power Turbo modes. The key is using a USB-C dock or adapter that supports both video output and sufficient power delivery, then setting the display and resolution correctly in Windows. In 2026, this setup is especially useful for players who want one device for travel, desk gaming, and TV play.
What You Need
| Item | Why | Optional? |
|---|---|---|
| ROG Ally or ROG Ally X | The handheld PC that supplies the game library, Windows desktop, and USB-C video output. | No |
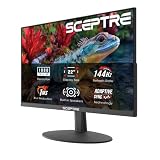
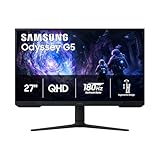
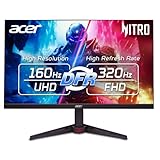
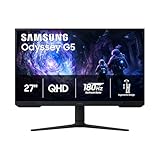
| External monitor or TV | Provides a larger display. A 1080p, 60Hz monitor is the simplest match for the Ally’s performance profile. | No |
| USB-C dock, hub, or USB-C-to-HDMI/DisplayPort adapter | Connects the Ally’s USB-C port to HDMI or DisplayPort while allowing charging. Look for DisplayPort Alt Mode and at least 65W USB-C Power Delivery pass-through. | No |
| USB-C power adapter | Powers the Ally through the dock. A 65W adapter is the practical minimum; a 100W adapter can provide more headroom for a dock and connected accessories. | No |
| HDMI or DisplayPort cable | Runs video from the dock to the monitor. Use a cable rated for the monitor’s intended resolution and refresh rate. | No, if built into adapter |
| Keyboard and mouse or controller | Makes desktop navigation, game launchers, and games without controller support more comfortable. | Yes |
| Portable monitor | Useful for travel or a small desk. The ASUS ZenScreen MB169CK is a 15.6-inch 1080p portable monitor priced around $109. A 7-inch clip-on AMOLED second screen, such as the ZHAOCAILIN model, is around $220 and is better for companion-screen use than replacing a main monitor. | Yes |
Step-by-Step
1. Choose the right monitor connection (5 minutes)
Check the ports on your monitor first. Most displays offer HDMI, while many desktop monitors also include DisplayPort. Your ROG Ally sends video through its USB-C port using DisplayPort Alt Mode, so it needs a compatible USB-C dock, hub, or adapter to convert that signal to the monitor’s input.
As an Amazon Associate we earn from qualifying purchases at no extra cost to you. Product prices and availability are accurate as of the date shown and are subject to change.


For a straightforward setup, choose a dock with one HDMI port, at least one USB-A port for a keyboard or mouse, USB-C Power Delivery input, and 65W or higher power pass-through. If you are buying for a desk monitor, HDMI at 1080p and 60Hz is enough for most Ally games. A 4K monitor will work, but running demanding games at native 4K is usually impractical; plan to set game resolution to 1920 × 1080 or lower.
2. Connect power to the dock before connecting the Ally (2 minutes)
Plug your USB-C charger into the dock’s port marked “PD,” “Power,” or “USB-C IN.” Then connect the charger to a wall outlet. This order helps the dock identify the available power before it negotiates charging with the handheld.
Use a quality 65W charger at minimum. If your dock has Ethernet, multiple USB accessories, an SSD, or a portable monitor drawing power from the same connection, a 100W charger is a safer choice. The Ally may still operate with lower wattage, but it can reduce charging speed or limit performance modes. Avoid relying on a basic phone charger, which may provide only 18W to 30W.
3. Connect the monitor to the dock (3 minutes)
Connect an HDMI cable from the dock to the monitor, or use DisplayPort if both the dock and monitor support it. Turn the monitor on and select the matching input using its input or source button. For example, choose HDMI 1 if the cable is connected to the HDMI 1 port.
Keep cable runs sensible and protected. A 3- to 6-foot cable is usually ideal for a desk setup because it avoids excess slack without putting tension on connectors. Do not sharply bend USB-C or HDMI cables behind the Ally, especially when the handheld is resting on a stand.
4. Connect the dock to the ROG Ally (2 minutes)
With the monitor on and the dock powered, plug the dock’s USB-C cable into the ROG Ally. The external screen should wake within a few seconds. Windows may briefly flicker while it detects the new display.
If nothing appears, wait 15 seconds, then confirm the monitor is on the correct input. Next, unplug and firmly reconnect the USB-C cable at the Ally. Some docks have a short built-in cable that can be strained by thick protective cases; remove the case temporarily if the connector does not seat fully.
5. Set the display mode in Windows (5 minutes)
On the Ally, open Settings, select System, then choose Display. Under “Multiple displays,” select the arrangement that fits your use:
- Duplicate these displays: Shows the same image on the Ally and monitor. Best for quick TV use or sharing the screen.
- Extend these displays: Creates a two-screen workspace. Best for using the monitor for games while keeping Discord, a browser, or game guides on the Ally screen.
- Show only on 2: Uses the external display only. Best for desk gaming and can reduce distraction from the Ally’s built-in screen.
You can also press Windows + P to switch display modes quickly. If Windows labels the screens in an unexpected order, select Identify in Display settings and drag the numbered display rectangles to match their physical positions.
6. Set a realistic resolution and refresh rate (5 minutes)
Select the external monitor in Windows Display settings and choose its resolution. Start at 1920 × 1080. This is a balanced target for the Ally because it looks sharp on common 24- to 27-inch monitors while being far less demanding than 2560 × 1440 or 3840 × 2160.
Then open Advanced display and choose the desired refresh rate. A 60Hz display is simple and dependable. If your monitor supports 120Hz, 144Hz, or higher, Windows may allow you to select it, but game performance still depends on the title and the Ally’s power mode. For demanding games, it is often better to use 1080p at 60Hz with stable frame pacing than chase a higher refresh rate the hardware cannot consistently fill.
7. Confirm power mode, audio, and game settings (8 minutes)
Open Armoury Crate SE and choose the performance mode that suits your setup. When using wall power and a capable dock, Turbo mode may be available. If a higher-power mode is missing, check that your charger, dock, and cable all support sufficient USB-C Power Delivery.
For sound through the monitor or TV, click the speaker icon in the Windows taskbar and select the HDMI or DisplayPort audio device. If you prefer headphones, connect them to the Ally or pair Bluetooth headphones after the external display is working.
Finally, open a game and check its video settings. Set the game to full-screen or borderless full-screen, select the external monitor if the game offers a display menu, and begin with 1080p. Lower in-game settings before lowering Windows resolution when you want better performance.
Mistakes to Avoid
- Using a video-only adapter with no power pass-through: The monitor may work, but the Ally will run on battery and drain quickly.
- Assuming every USB-C hub supports video: Some hubs provide charging and USB ports only. Confirm DisplayPort Alt Mode or HDMI output support before buying.
- Using an underpowered charger: A 20W or 30W charger can trigger slow charging and may restrict performance.
- Setting a 4K monitor to 4K for every game: Use 1080p or a game’s internal resolution scaling for smoother play.
- Leaving the Ally flat on a soft surface: Keep its rear vents clear. A small stand that holds the device upright is preferable to a bed, couch, or thick desk mat.
- Forgetting to select the monitor input: A “No Signal” message often means the monitor is set to the wrong HDMI or DisplayPort source, not that the Ally has failed.
How Often
You only need to complete the full setup once per monitor or dock. After that, connecting the powered dock to the Ally should take less than a minute. Recheck Windows display settings whenever you switch between a desk monitor, TV, or portable display.
Inspect cables and dock ports every few months, particularly if the setup travels often. Replace a cable if the image cuts out when moved, the connector feels loose, or charging repeatedly connects and disconnects. Keep the Ally’s vents and the dock’s ventilation openings free of dust during normal cleaning.
When to Call a Pro or Replace
Most external-monitor problems are solved by changing the input, cable, dock, or Windows display mode. Consider replacing the cable first if it is visibly damaged or if another cable works immediately. Replace a dock or adapter if it consistently fails with multiple known-good monitors and cables, gets unusually hot during light use, has a loose USB-C connection, or no longer passes stable power.
A repair professional is appropriate if the Ally’s USB-C port is physically loose, bent, scorched, or fails to charge and output video with several tested chargers and docks. Stop using the device if you notice burning smells, discoloration, swelling, or excessive heat around the port. Those symptoms are not normal setup issues.
FAQ
Can I connect a ROG Ally directly to a monitor with USB-C?
Yes, if the monitor has a full-featured USB-C video input that supports DisplayPort Alt Mode. However, many USB-C monitors still need their own power source. A powered dock is usually the more flexible choice because it can charge the Ally and connect USB accessories at the same time.
Why does my ROG Ally show a black screen on the external monitor?
First, verify the monitor’s selected input. Then unplug and reconnect the dock, test a different HDMI or DisplayPort cable, and press Windows + P to choose Duplicate, Extend, or Second screen only. If the problem continues, restart the Ally while the powered dock and monitor are connected.
What resolution should I use for gaming on an external monitor?
Start with 1920 × 1080. It is compatible with nearly every modern monitor and is generally the most practical balance of image quality and performance. For demanding games, use in-game upscaling or lower graphics settings before moving to a lower desktop resolution.
Can I use the Ally screen as a second monitor while gaming on the external display?
Yes. Choose “Extend these displays” in Windows Display settings. You can run the game on the external monitor and place chat, music controls, a browser, or a guide on the Ally’s built-in screen. For the simplest gaming experience, choose “Show only on 2” instead.